Showing posts with label tutorial. Show all posts

Thursday, 23 October 2014

Halloween Makeup Tutorial! | leeannpatricia


Its been a long time, I know but I'm trying to get back into blogging weekly! I have been super busy with college and that's been my main focus at the moment, so I hope you understand! 
So its nearly Halloween! and although I'm not doing anything this year I have to say I'm super excited for all the crazy tutorials! 
So I decided to go for a bright but bold makeup look and I absolutely love it. Its super quick and easy to do for your Halloween night! So if your one that doesn't know what to do for Halloween this is perfect for you!

So lets get started..


Step 1
Its pretty simple so just prime and conceal your eyes!

Step 2
You want to create a thick winged line using Gel eyeliner and fine liner brush when you've got it perfect you want to drag the end of the liner into the crease to create a 'cut crease'. When that is done you want to blend the line you created for the crease upwards! 

Step 3
Once that is done, its time for abit of colour! You can choose any colour you want but I thought Orange and Yellow seemed to fit the theme. So put the orange half way across the eye and apply with a flat eyeshadow brush, and then apply the yellow. You want to blend the two colours together so grab a fluffy brush and blend, blend, blend! 

Step 4
Its time for a pop of white! (You can either grab a glitter white shadow and a matte white) So what I did was grab another flat brush and applied the white into the yellow and in the corners of the eyes!

Step 5
Now put  black into the crease so grab a matte black on a fluffy brush and blend that crease till your happy with it!

Now you can apply big lashes if you want to or just use mascara...but your done!


Hope you enjoyed the tutorial! If you want to know anything else please feel free to leave a comment or email me! Also if you want to see an in depth tutorial feel free to comment and maybe I will make a video for you all!
Thank you for reading
x


Sunday, 31 August 2014

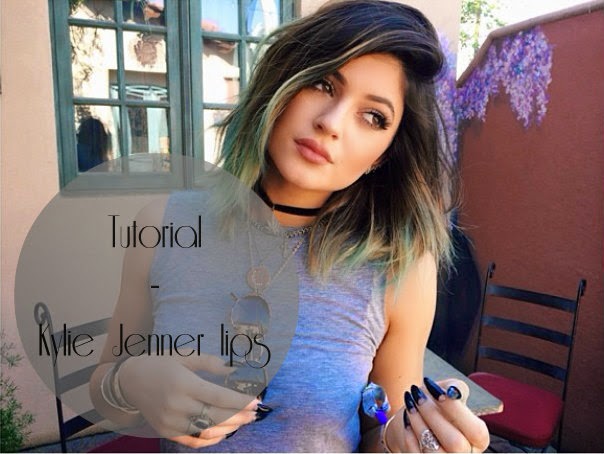
Kylie Jenner Lips In 4 Easy Steps | leeannpatricia


Recently I have been obsessed with Kylie Jenner. However we have all heard the rumours about her having her lips done but I'm here to show you how you can achieve Kylie Jenner lips quick and easy, just using makeup.

Now since I have started wearing lipstick more recently, I do this step before applying my chosen colour! The good thing about this is that you hardly need any products to re-create big lips!

Step 1
Now step one is pretty easy, so firstly you want to conceal you lips so you can achieve a nude colour. I'm using Maybelline's cover stick in 01 Ivory. 

Step 2
This step is a must do, I always apply Carmex before any make-up application so my lips don't dry out.
I applied this over the concealer though so it didnt start to crack. Then I patted it into my lips so my lips weren't glossy.

Step 3
For this step you will need a brown lip pencil or eyeliner pencil. I am using a eyeliner pencil by N07. I start by tracing my lips but going over them so they look a little bit bigger than normal. After this step you want to grab your lip brush and start smudging the line so it blends into your lips. 

step 4
Another easy step for you all is by grabbing your favourite nude or pinky coloured lipstick and I'm using Rimmel London's Volume Booster Lipstick in 102 FOXY. I apply this in the middle of the lips, afterwards using the same lip brush you used earlier fill in the edges!

Now if you aren't great with staying in the lines you can easily grab your concealer and clean up the edges!.. And now your done! Kylie Jenner lips made simple.

Here the finished look!


Who's your celebrity crush at the moment?

If theres anymore looks you want me to re-create let me know in the comments and feel free to contact me!
Thank you for reading 
x

Wednesday, 27 August 2014

Hair Care Routine | leeannpatricia


Hi guys! How have you all been recently? 
Today I've decided to share with you my hair care routine, its pretty simple but I thought someone may be interested!

So I know its pretty gross, but I rarely brush my hair purely because it turns into a frizzy mess! The only problem with this is that brushing knots out of my hair is... painful. I find that washing my hair too much can actually make my hair super greasy! Plus it's not good for your hair washing it daily anyway! So I wash my hair every other day, but shower daily! 
Now your probably wondering how I know that washing your hair daily isn't great? Well studying hairdressing for three years and getting a full qualification out of it, is always helpful. 

Anyway, moving on. For the products I use! Its pretty obvious that when I wash my hair I use shampoo and conditioner, so heres a little bit of information about the products I use. 


Now I use Aussie products, as they are literally my holy grail products. So for shampoo I use the Colour Mate Shampoo, which is obviously for coloured hair. I only colour my hair about once a year but I still find my hair becomes very dry after having bleach on it, but I find this shampoo helps keeping the colour vibrant and protects it from chemical damage. For conditioner, I used to use the matching one but I find that my hair wasn't getting enough moisture from it. Anyway, I picked up the Miracle Moist Conditioner, for dry and damaged hair and it works wonders! When the conditioner is on my hair I always brush it through. I found that since using this conditioner makes my hair feels so much softer and healthier. And by the way, both products smell AMAZING!

Now there are a couple of other steps that I do after I get out the shower..
The next step is putting oils in my hair, which has became a key step in my hair care routine!


I like to put oils in my hair as recently it has been getting pretty dry, so I stopped using as much heat, such as curlers and straighteners on my hair and started using oils! Now this product is called Moroccanoil, and it leaves a stunning result to my hair, it also makes my hair feel so nice and smelling beautiful. I've been using it for a couple of weeks now and I prefer to apply it to my hair when its been freshly washed, as I find the results are even better. Sometimes I do use it on dry hair when I feel like my hair needs a bit of life pushed into it. However this product can be a little bit expensive, so I buy the smallest bottle which can last a long time (which is great). 

So I don't use my heat on my hair as much as I used to, but I still like to put heat protection on my hair so I know its protected for any heat I may use randomly.


There are two different types of heat sprays I like to use, the one on the left is really cheap but does the job. I find that this is the one I use more when my hair has been freshly washed. It protects the hair against any heat damage and adds shine when using straighteners, curling tongs and hair dryers which is a bonus! The one on the right is more for when you are straightening your hair and this is more expensive out of the two as its Toni&Guy. Now it has maximum heat protection for straight styles, this product protects against any heat damage, it conditions and smooths and also boosts natural shine.
However I never use any heat when drying my hair, I find that leaving my hair to dry naturally saves it from being damaged anymore! Its just a personal preference but it doesn't mean that it will completely damage your hair if you do so.

Now I know I don't use that many products on my hair but it works for me! For finishing products I just use Wella hairspray in number 3 (Secure hold) and thats about it!

Whats your holy grail hair product?

If you have any questions, let me know! 
Thank you for reading
x

Design by | SweetElectric